Introduction to Virtual Cameras in Live Streaming
Virtual cameras have become an essential tool in the live streaming and content creation landscape. They enable broadcasters to integrate a variety of visual sources and present them as a single output that can be used in video conferencing software or other streaming platforms.
The Role of OBS as a Broadcasting Solution
OBS is a powerful open-source software that provides users with the ability to create professional-looking live streams. It includes a virtual camera feature that extends its functionality beyond traditional live streaming.
Setting Up OBS for Virtual Camera Use
Open Broadcaster Software (OBS) is a versatile tool for content creation, allowing seamless broadcasting and recording capabilities. With the integration of a virtual camera, OBS users can output their video mix to video conferencing apps, providing a professional touch to online presentations, meetings, or streaming sessions.
Installing OBS Studio
To take advantage of virtual camera functionality, you need to have OBS Studio installed on your computer.
Downloading OBS Studio
Visit the official OBS Studio website to download the latest version compatible with your operating system. OBS Studio is available for Windows, macOS, and Linux.
Running the Installation Wizard
Once downloaded, run the installation file and follow the on-screen instructions to install OBS on your computer. You can choose the installation path and shortcuts during this process.
Initial Setup and Configuration
Upon launching OBS for the first time, it’s recommended to use the Auto-Configuration Wizard to optimize the software for your setup.
Using the Auto-Configuration Wizard
The wizard will prompt you with a set of questions about your intended use (streaming or recording) and propose settings based on your system’s capabilities.
Manual Adjustments
If needed, you can manually adjust these settings later through the Settings menu, where you can fine-tune aspects like stream quality, output resolution, and more.
Familiarizing yourself with the OBS interface is crucial to managing your streams and recordings effectively.
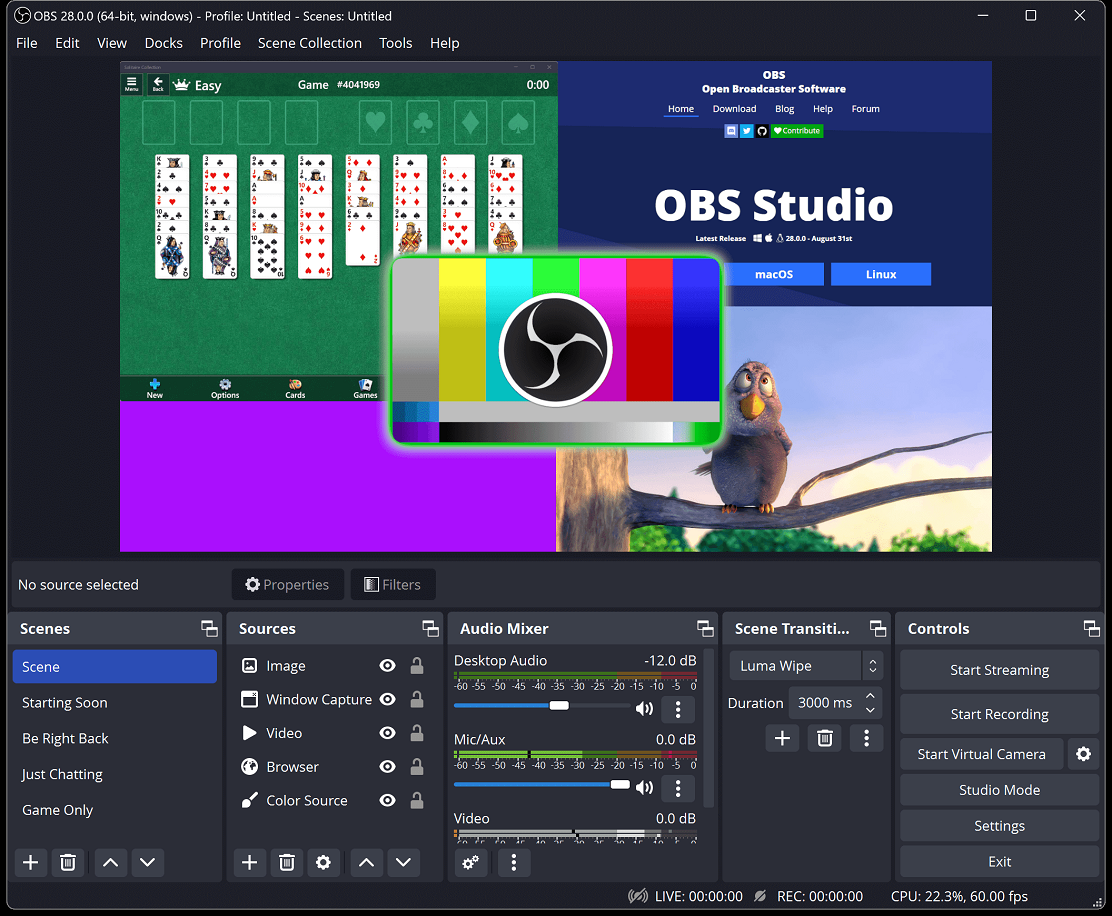
Understanding Scenes and Sources
OBS operates on a system of scenes and sources. Scenes are collections of sources, and sources can be anything from cameras and microphones to images and browser windows.
The Audio Mixer
The audio mixer allows you to control audio sources. Here, you can adjust volume levels, apply filters, and manage audio properties.
Controls Panel
The controls panel is where you’ll find essential controls like Start Streaming, Start Recording, and, most importantly for virtual camera use, Start Virtual Camera.
Adding Sources to Your Scene
Before enabling the virtual camera, you need to set up the visual elements of your broadcast.
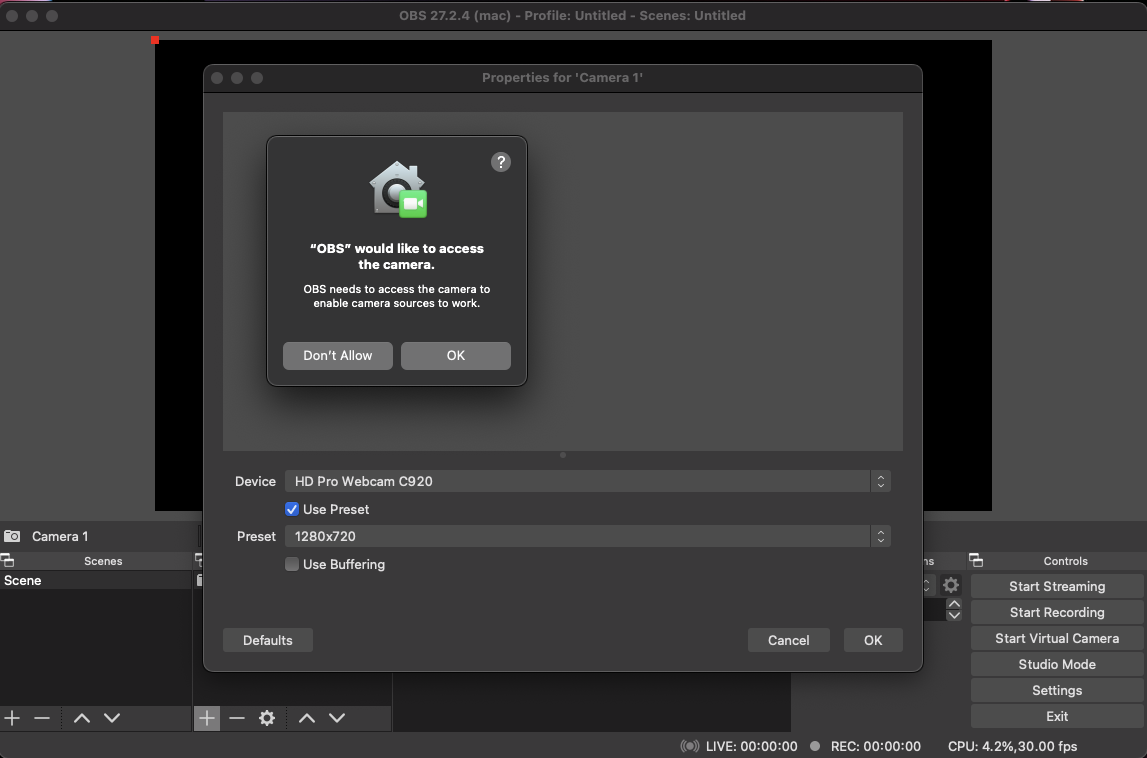
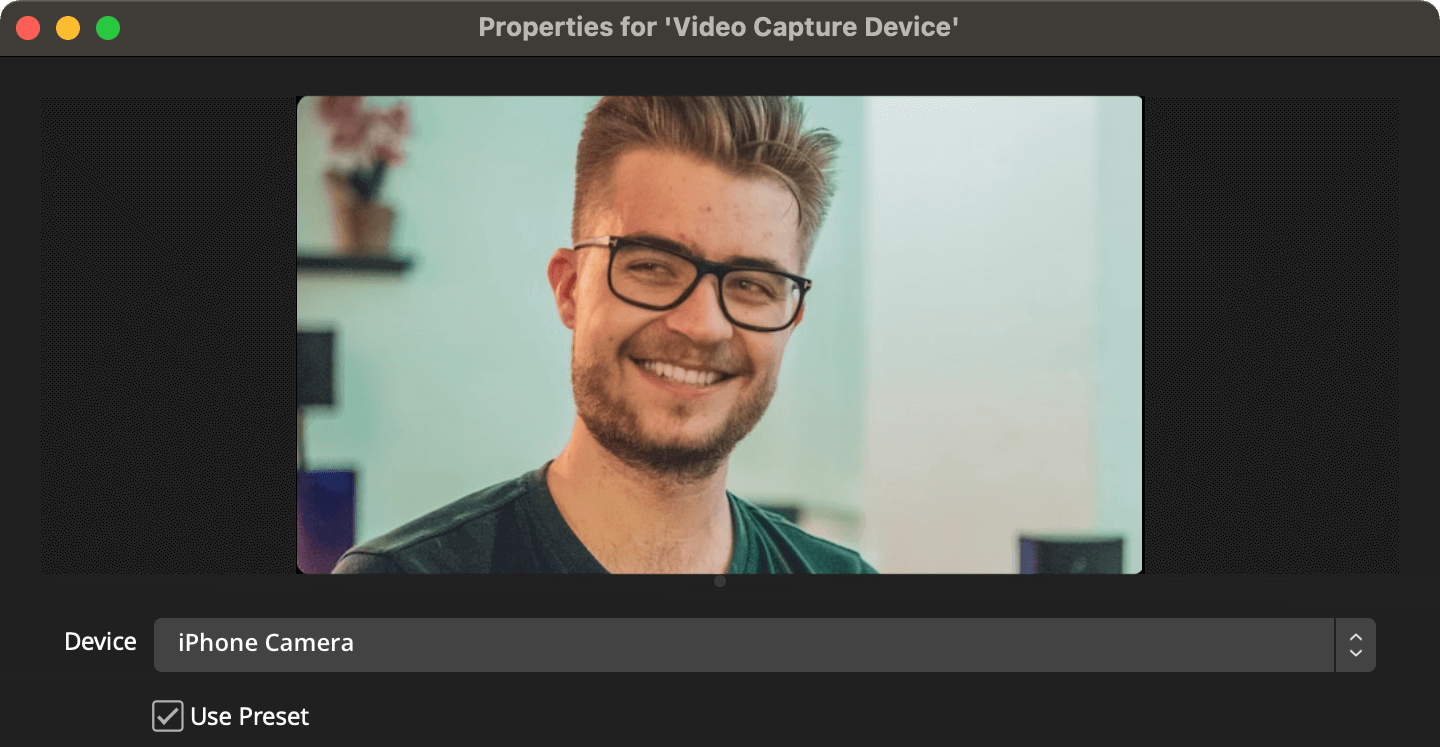
Video Capture Devices
Add your webcam or external camera by clicking the “+” icon in the Sources panel and selecting ‘Video Capture Device.’ Configure the properties to suit your needs.
Adding Other Media Elements
You can enhance your scene by adding additional sources such as images, text, or pre-recorded videos by using the same “+” button in the Sources panel.
Configuring the Virtual Camera Output
Once your scene is ready, and sources are set up, you can configure the virtual camera output.
Starting the Virtual Camera
To start the virtual camera, simply click on ‘Start Virtual Camera’ in the Controls panel. This will activate the virtual camera output, which you can then select in other applications.
Setting the Output Resolution
Ensure that the output resolution of the virtual camera is appropriate for your destination application. This can be adjusted in the Video settings under the Settings menu.
Using Virtual Camera with Video Conferencing Software
The virtual camera output from OBS can be used across different applications that support video input.
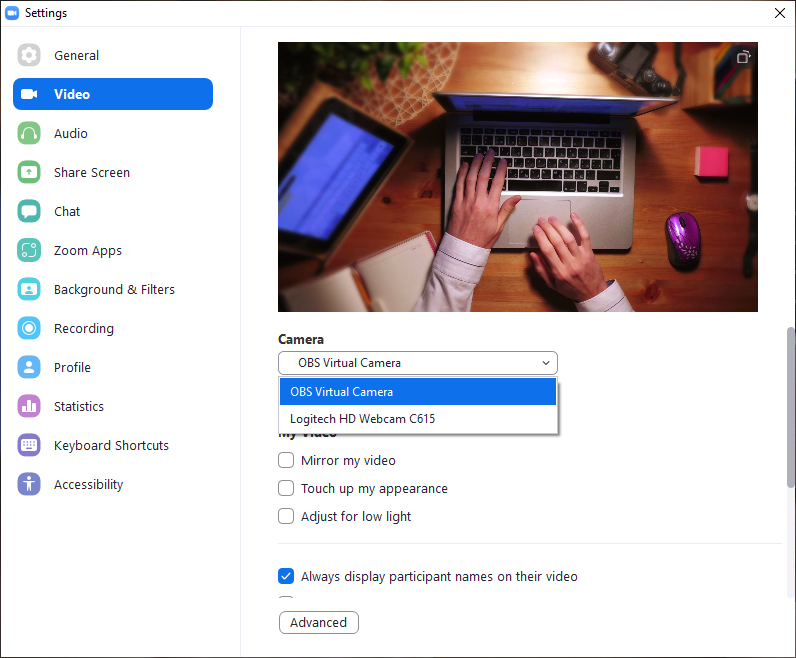
Selecting OBS Virtual Camera as the Video Source
In your video conferencing software, go to the camera settings and select ‘OBS Virtual Camera’ from the list of available cameras.
Adjusting for Latency
Be mindful of any latency between the live video feed and the virtual camera output. Adjust sync settings in OBS if necessary to ensure your audio and video are in harmony.
Enhancing Your Broadcast with OBS Features
OBS provides a host of features to improve the quality and professionalism of your broadcast.
Scene Transitions
Use OBS’s built-in transitions to switch between scenes smoothly. You can choose from different styles and even add custom stinger transitions.
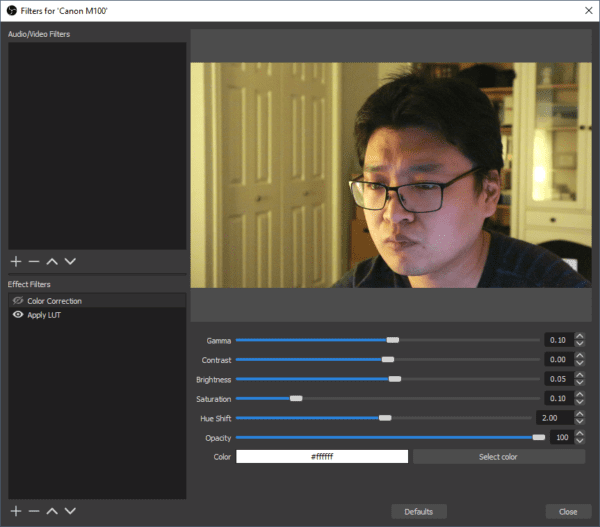
Audio and Video Filters
Apply filters to your audio and video sources to correct issues or add effects. Filters include color correction, chroma key, noise suppression, and more.
Hotkeys for Efficiency
Set up hotkeys for common actions like switching scenes or starting/stopping the virtual camera to streamline your workflow during live sessions.
Successfully Integrating Virtual Camera into Workflows
The virtual camera feature in OBS opens up new possibilities for content creators and professionals engaging in online communication.
Use Cases for Virtual Camera
Virtual camera outputs are perfect for online teaching, virtual presentations, or enhancing your professionality during video calls.
Continuous Learning and Experimentation
As with any software, the key to mastering OBS and its virtual camera feature is continuous learning and experimentation. The OBS community provides a wealth of resources, including forums and tutorials, to help users improve their skills.
Creating and Managing Scenes
Building Your First Scene
Scenes are the building blocks of your broadcast. Create your first scene by naming it appropriately and adding sources like video capture devices, images, or text overlays.
Scene Transitions and Effects
Learn to enhance your stream with smooth scene transitions and various effects. OBS offers several transition styles that can be customized according to your preferences.
Adding and Customizing Sources
Video Capture Devices as Sources
Add a video capture device as a source to incorporate live video into your scenes. This might include your webcam or a professional camera connected to your computer.
Incorporating Media Files and Other Elements
Beyond live video, OBS allows you to include images, pre-recorded videos, screen captures, and browser sources into your scenes.
Utilizing the Virtual Camera Feature
Starting the Virtual Camera
Once your scene is ready, you can start the Virtual Camera by clicking on the “Start Virtual Camera” button in the Controls panel. This output can then be selected as the video source in video conferencing apps or other streaming services.
Using Virtual Camera with Video Conferencing Software
Whether you’re using Zoom, Skype, or another platform, select OBS Virtual Camera as your camera source to bring your customized OBS scene into your calls or meetings.
Advanced Virtual Camera Techniques
Adding Interactive Elements
Interactive elements like chat boxes or alert notifications can make your stream more engaging. Use browser sources to add dynamic content that updates in real time.
Working with Green Screens
OBS supports chroma keying, which allows you to use a green screen to replace the background with any image or video source, adding a professional touch to your virtual camera output.
Audio Management in OBS
Configuring Audio Sources
Good audio is crucial for effective communication. Configure your microphone and any other audio sources, ensuring proper levels and quality for your broadcast.
Mixing and Filtering Audio
OBS provides tools for advanced audio mixing and filtering, including noise gates, compressors, and equalization, to help you achieve the best sound possible.
Enhancing Your Virtual Camera with Plugins
Exploring OBS Plugins
To expand the functionality of OBS, explore the wide range of available plugins. These can add features like motion tracking, advanced audio processing, or new transition effects.
Installing and Configuring Plugins
Learn the process for installing plugins into OBS and how to configure them to work seamlessly with your existing setup.
Optimizing Performance and Quality
Balancing Resource Usage
Ensure that OBS is optimized for performance by adjusting settings like output resolution and frame rate to balance quality with resource usage on your computer.
Monitoring System Performance
Keep an eye on system performance while using OBS to ensure that your virtual camera feed remains smooth and free from interruptions.

Troubleshooting Common Issues
Addressing Virtual Camera Not Showing Up
If the virtual camera isn’t appearing as an option in other software, follow troubleshooting steps to resolve this, such as restarting OBS or ensuring you’re running the latest version.
Solving Audio Sync Issues
Audio synchronization problems can occur when using virtual cameras. Learn the techniques for diagnosing and fixing audio sync issues within OBS.
Best Practices for Using Virtual Camera in OBS
Preparing Content Ahead of Time
Prepare and test all your content ahead of your live session. This includes checking all sources, transitions, and interactive elements to ensure they function correctly.
Engaging with Your Audience
Even when using a virtual camera, audience engagement is key. Plan how you will interact with viewers during your live stream or video call to create a compelling experience.
Conclusion
The virtual camera feature in OBS is a powerful way to enhance your live streaming or video conferencing presence. With a combination of creativity and technical know-how, you can leverage OBS to create a professional and interactive broadcast. From setting up scenes and sources to troubleshooting common issues, mastering the use of virtual camera in OBS can elevate your video content to new heights. Remember to keep exploring new features and plugins to stay ahead in the evolving world of live streaming technology.