Introduction to Android Camera Settings
The camera on your Android device is a powerful tool that, when used with the correct settings, can produce stunning photographs comparable to those taken with traditional cameras. Understanding and mastering the various settings available can greatly enhance the quality of your images. This comprehensive overview will guide you through the essentials of Android camera settings and provide tips for capturing the best possible photos with your device.
When you open the camera app on your Android device, you will typically find a gear icon or three dots that indicate the settings or options menu. Tapping on this will reveal a list of settings you can adjust. Some devices may have different icons or menus, but most will follow this general layout.
Understanding Resolution and Aspect Ratio
The resolution of your camera determines the detail and clarity of your images. Higher resolutions mean more pixels and greater detail, but they also result in larger file sizes.
- Resolution Settings: Adjust the resolution in your camera settings to match your needs. For instance, if you’re planning to print your photos, a higher resolution would be beneficial.
- Aspect Ratio: This is the ratio of the width to the height of your images. Common aspect ratios include 4:3 (standard) and 16:9 (widescreen). Choose the ratio that best suits how you intend to use or display the photo.
Exploring Advanced Camera Modes
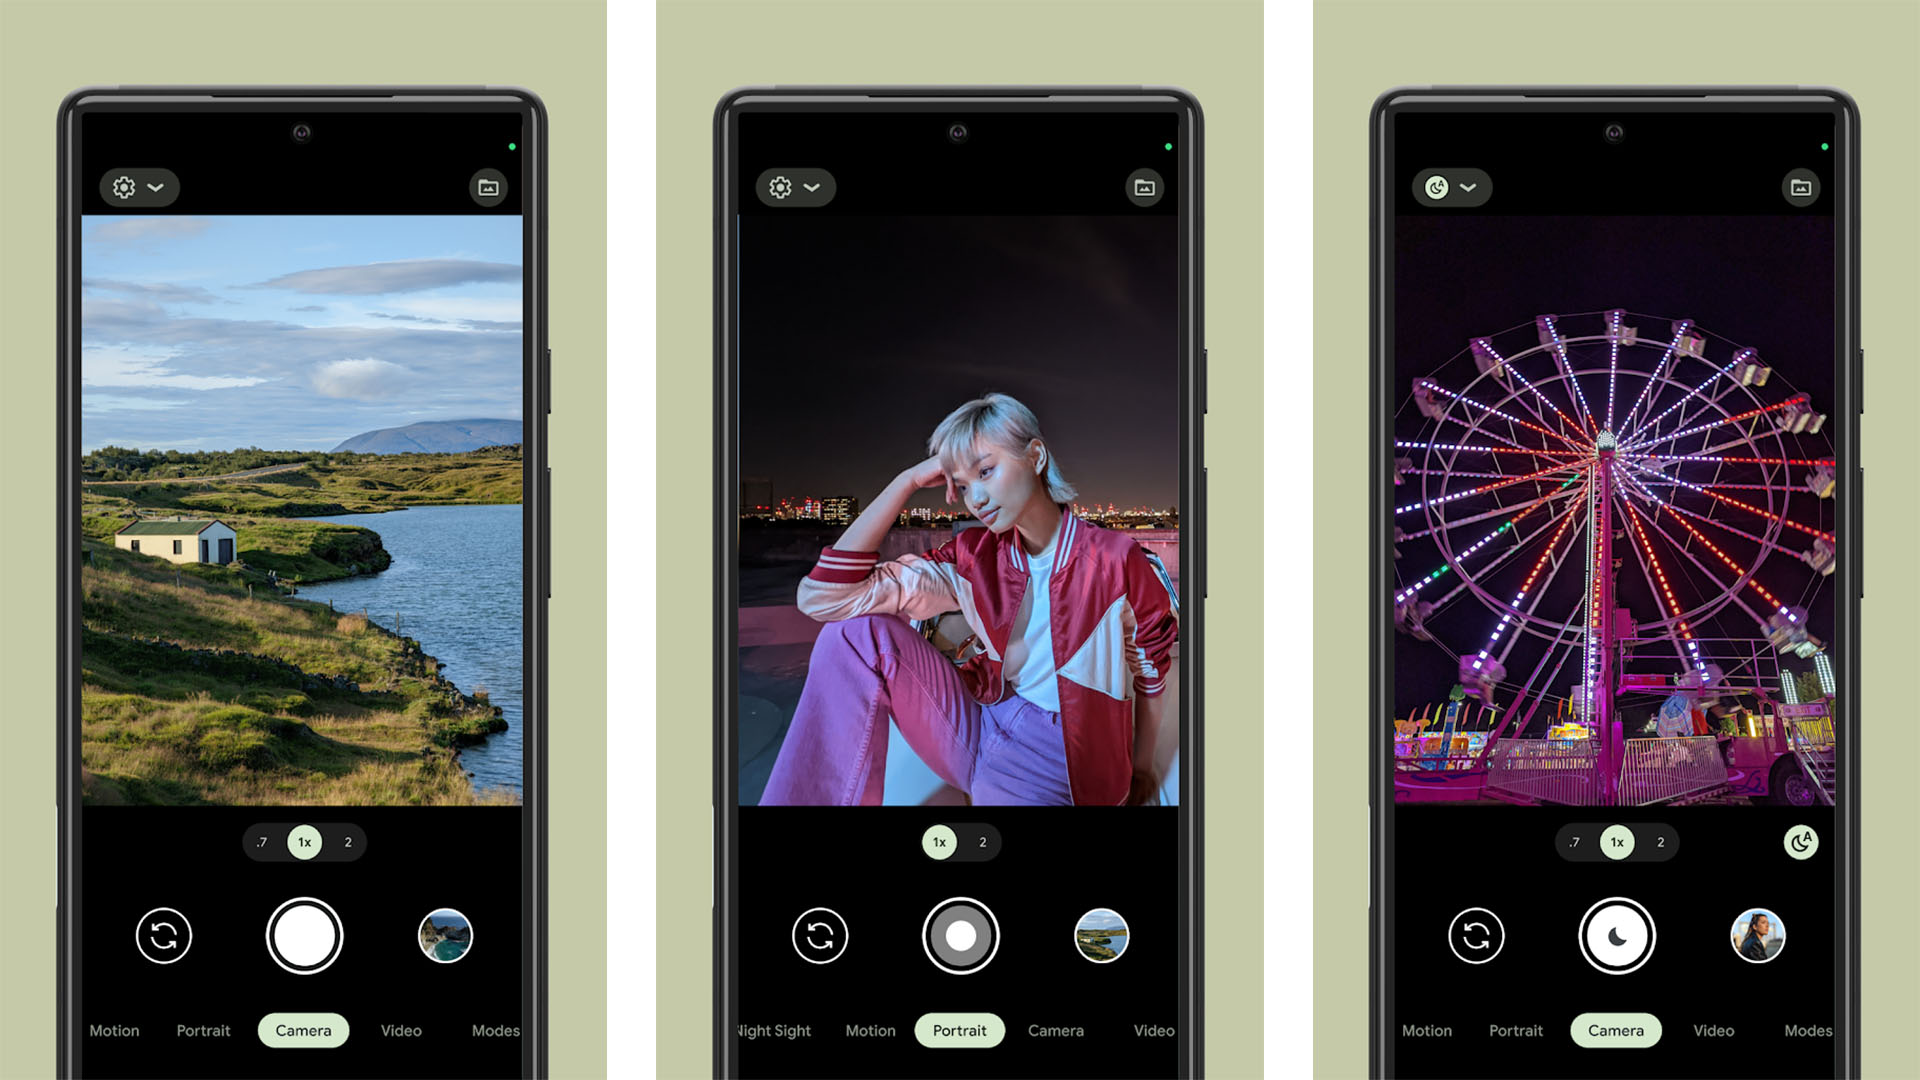
Most Android camera apps come with various modes that you can select depending on the situation:
- Auto Mode: The camera automatically selects settings for the best overall photo.
- Pro or Manual Mode: Allows you to manually adjust settings such as ISO, shutter speed, and white balance.
- Portrait Mode: Designed to capture flattering images of people by focusing on the subject and blurring the background.
- Landscape Mode: Optimizes settings for capturing wide scenes with maximum detail.
- Night Mode: Adjusts settings to capture better images in low-light conditions.
Mastering Focus and Exposure
Your Android camera‘s focus and exposure settings are crucial for capturing sharp images with the correct brightness.
- Tap to Focus: Tap on the subject in your viewfinder to focus the camera on that point.
- Manual Focus: In Pro mode, you can adjust the focus manually if your device supports this feature.
- Exposure Compensation: Adjust the exposure to make your images brighter or darker. This is often represented by a slider or +/- symbol in your camera app.
Controlling ISO and Shutter Speed
ISO and shutter speed are important settings that impact the amount of light captured in a photo.
- ISO: Determines the camera sensor’s sensitivity to light. A lower ISO is used in bright conditions to prevent overexposure, while a higher ISO is used in low light.
- Shutter Speed: Affects how long the camera’s sensor is exposed to light. A faster shutter speed can freeze motion, while a slower shutter speed can create a motion blur effect.
Balancing Colors with White Balance
White balance affects the color temperature of your photos, which can influence mood and realism.
- Auto White Balance: The camera will attempt to correct the color based on the lighting conditions.
- Manual White Balance: Adjust the white balance manually if the auto setting is not giving you the desired results. You can select from presets such as Daylight, Cloudy, or Tungsten.
Utilizing HDR for High-Contrast Scenes
HDR, or High Dynamic Range, is a feature that combines multiple shots taken at different exposures to create a single image with a more balanced exposure.
- When to Use HDR: Use HDR in situations where there is a significant difference in brightness between different areas of your scene.
- HDR Considerations: HDR can cause images to look artificial if overused or used inappropriately, so use this feature judiciously.
The Role of Flash in Photography
The flash can be a valuable tool in your photography, but it can also create harsh and unflattering images if not used correctly.
- Using Flash: Use flash in low-light situations or to fill in shadows when the main light source is behind the subject.
- Disabling Flash: In most cases, natural light will produce better results. Disable the flash to avoid the flat, washed-out look that can come from using the on-camera flash.
Implementing the Rule of Thirds with Grid Lines
The rule of thirds is a compositional guideline that suggests dividing your image into nine equal parts using two horizontal and two vertical lines.
- Grid Lines: Enable grid lines in your camera settings to help you align your shot according to the rule of thirds.
- Subject Placement: Place the most important elements of your scene where the grid lines intersect for a more aesthetically pleasing composition.
Video Settings for Capturing Motion
For capturing videos, your Android camera offers separate settings to ensure high-quality motion capture.
- Resolution and Frame Rate: Choose the right combination of resolution and frame rate for your video. Higher frame rates are better for capturing fast action, while higher resolutions provide more detail.
- Stabilization: If your device supports it, enable stabilization to reduce camera shake and create smoother video footage.
Maximizing Camera Performance with Memory and Storage
To ensure your camera operates smoothly and quickly, manage your device’s memory and storage effectively.
- Clearing Cache: Regularly clear your camera app’s cache to free up memory and improve performance.
- Storage Options: If your device allows, use a high-speed SD card for expanded storage, especially if you’re shooting high-resolution images or video.
Conclusion: Fine-Tuning Your Android Camera for Optimal Results
Android camera settings offer a wealth of options for capturing high-quality images. By understanding and adjusting these settings to your specific needs and the conditions in which you’re shooting, you can greatly enhance the final outcome of your photos. Experiment with different modes, understand the impact of light, and don’t be afraid to try manual adjustments to discover the full potential of your Android camera. With practice and patience, you’ll be able to take photos that truly stand out.