Understanding Camera Issues During Google Meet Sessions
Google Meet has become a staple for remote meetings and virtual classrooms. However, users occasionally face camera malfunctions that can disrupt their video conferencing experience. This article delves into the common causes of camera failure in Google Meet, along with detailed troubleshooting steps to resolve these issues effectively.
Common Reasons for Camera Failure
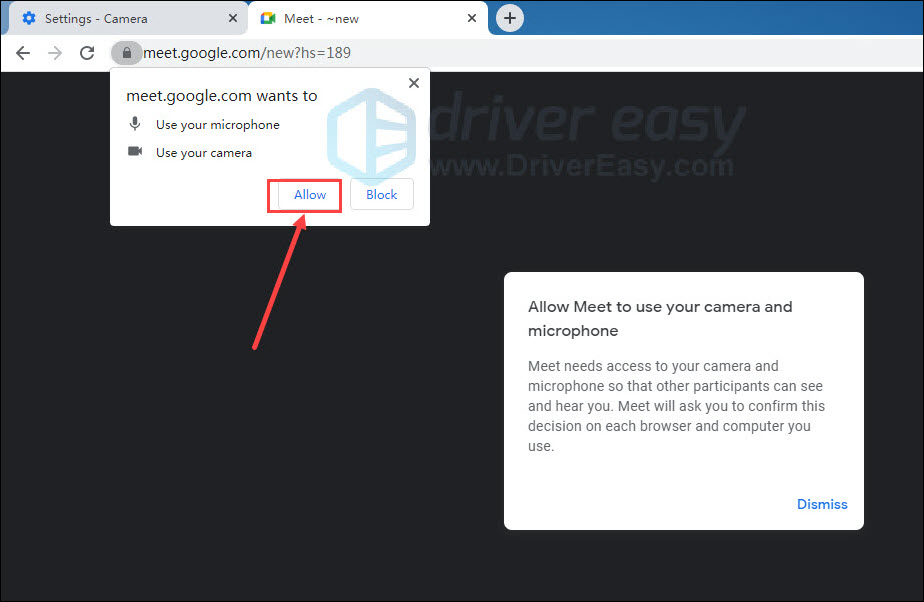
- Permission Denial: One frequent cause is when the Google Meet app does not have permission to access your device’s camera. This could be due to privacy settings or an unintentional denial during installation or use.
- Outdated Software: An outdated browser, operating system, or Google Meet app may lead to camera compatibility problems. Updates often contain bug fixes and support for new hardware features, so staying current is essential.
- Hardware Malfunction: Physical damage to your camera, low battery on mobile devices, or loose connections can prevent the camera from functioning properly in Google Meet.
- Conflicting Applications: Running other apps simultaneously that are using the camera can interfere with Google Meet’s ability to connect to it.
- Driver Issues: Incorrect or outdated camera drivers can lead to the camera failing to work in Google Meet.
Step-by-Step Troubleshooting Guide
Step 1: Grant Camera Permissions
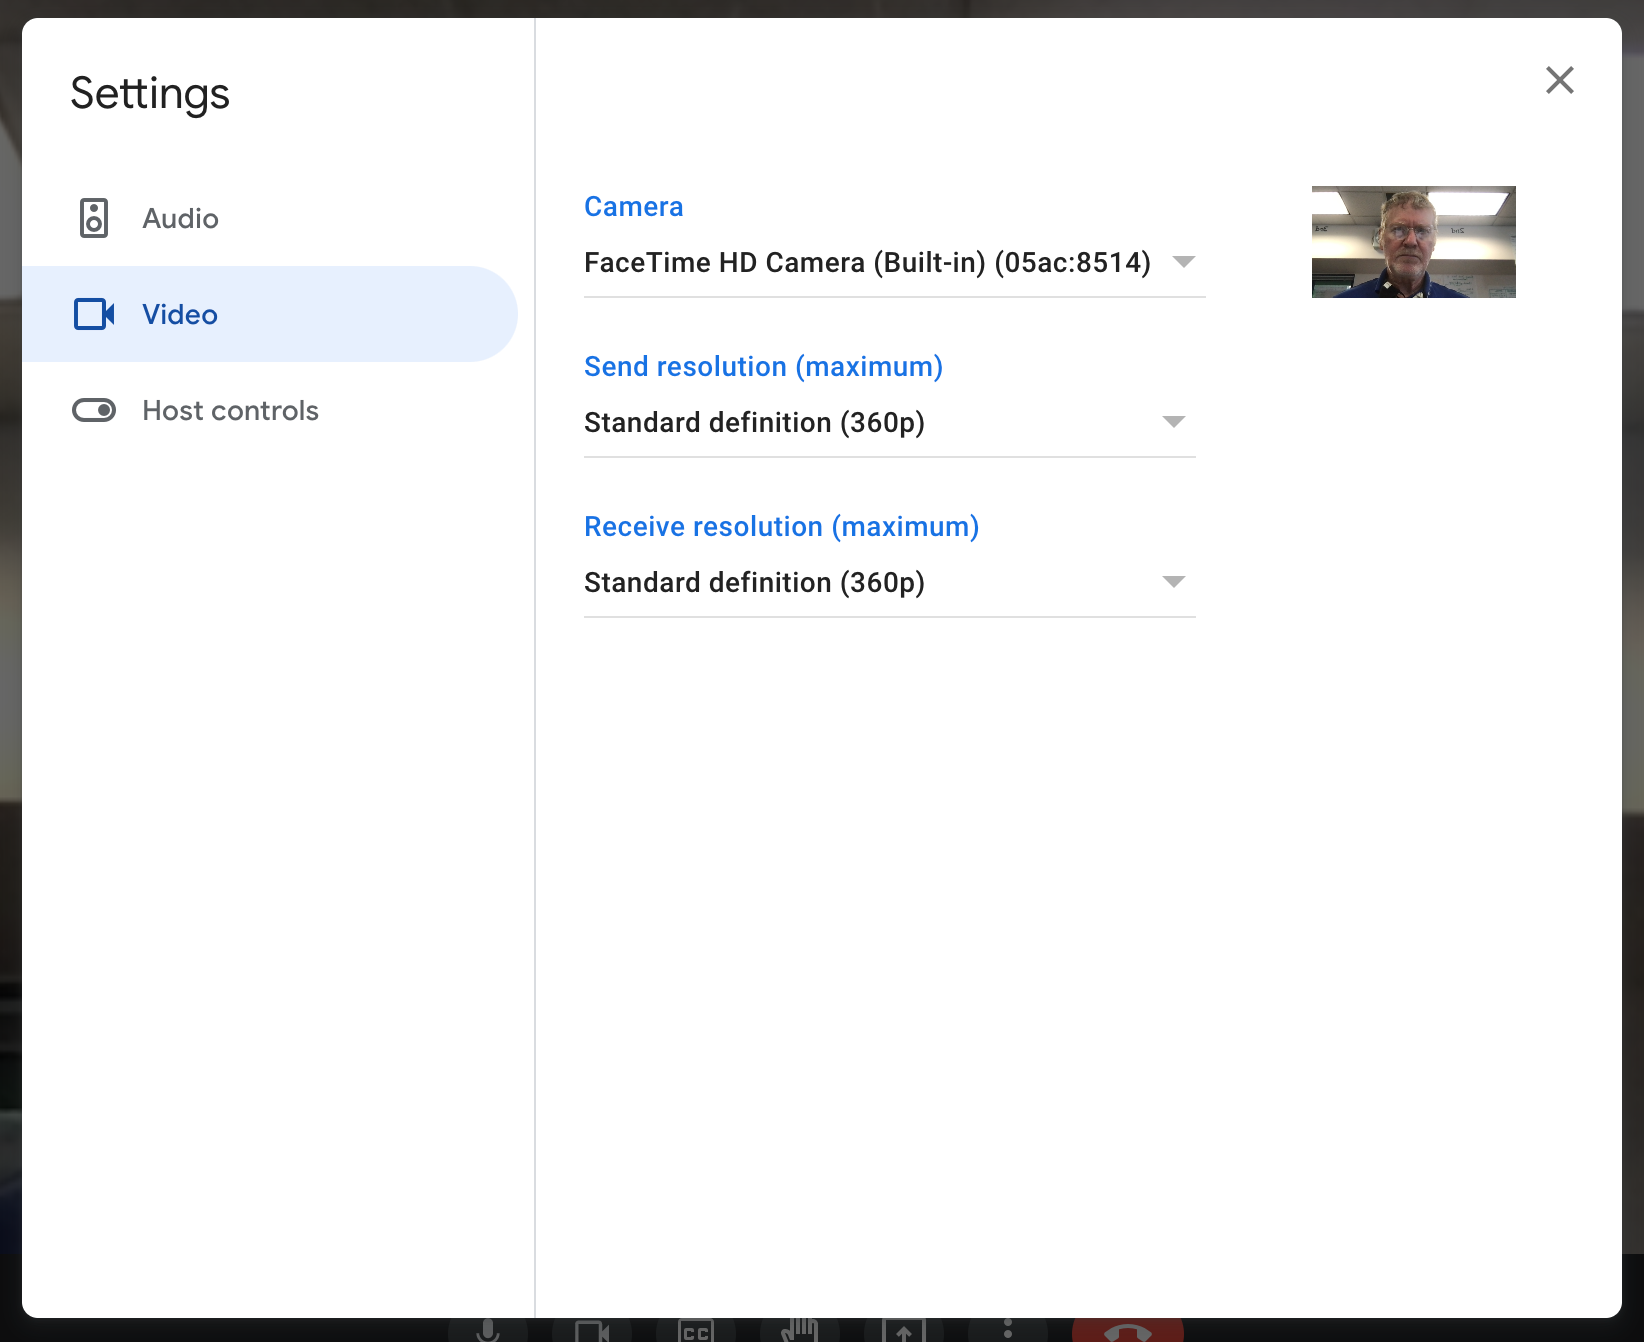
For web browsers, ensure you’ve granted camera permissions by clicking the camera icon at the top of the Google Meet window and selecting “Always Allow.” For desktop and mobile apps, check the app permissions in your device settings.
Step 2: Update Software
Update your web browser, operating system (Windows, macOS, iOS, or Android), and the Google Meet app itself to the latest version. This ensures compatibility with your device’s camera and eliminates known bugs.
Step 3: Inspect Hardware
Physically examine your camera lens for dirt or damage. If using a laptop, try restarting it to refresh the connection. On mobile devices, ensure the camera lens is clean and the battery level is sufficient.
Step 4: Close Conflicting Apps
Close any applications running in the background that might be using the camera. Restarting your device can also help terminate these processes.
Step 5: Check and Update Drivers
For desktop users, visit your computer manufacturer’s website to download and install the latest camera driver. On Windows, you can also manually update drivers through Device Manager.
Advanced Troubleshooting Techniques for Camera Failure in Google Meet
When basic troubleshooting steps fail to resolve camera issues during Google Meet sessions, there are several advanced techniques you can employ. These methods dive deeper into system configurations and may require a bit more technical knowledge.
Disabling or Managing Browser Extensions
Browser extensions sometimes conflict with Google Meet’s access to your device’s camera. Disable non-essential extensions temporarily to see if this resolves the issue. In Chrome, visit chrome://extensions/ and toggle off any suspicious or untrusted extensions.
Enabling Flags (Chrome)
Google Chrome offers experimental features that could potentially fix camera problems. Access chrome://flags and search for ‘WebRTC’. Try enabling or disabling different WebRTC flags related to camera usage, then relaunch the browser to apply changes.
Using Built-in Diagnostics Tools
Some devices have built-in diagnostic tools that can check the health of the camera. For instance, on Windows 10, you can use the Device Manager’s “Troubleshoot” option for the camera hardware. On Mac, run Apple Diagnostics or Apple Hardware Test (depending on the model) to identify any hardware issues.
Testing Camera in Other Apps
Test the camera functionality in other applications like the default camera app on your device or another video conferencing tool. If it works elsewhere but not in Google Meet, the problem might be specific to Meet settings or permissions.
Adjusting Power Management Settings
Laptops may disable the camera to save power. Check your power management settings to ensure the camera is not being disabled when running on battery. On some laptops, you may need to manually enable the camera in BIOS settings.
Using Third-party Camera Software
Use third-party webcam software to test and diagnose camera issues. Applications like ManyCam or OBS Studio can help isolate the problem by providing additional diagnostics and configuration options.
Modifying Group Policy (Windows Only)
For enterprise-level users on Windows, modifying group policies can help troubleshoot camera access. Navigate to Local Group Policy Editor (gpedit.msc) and look for policies under User Configuration > Administrative Templates > All Settings that might block or limit camera access.
Seeking Professional Help
If all else fails, consider reaching out to your IT support team or the device manufacturer’s customer service. They can provide detailed guidance based on your specific device and setup, potentially including remote diagnostics or repair services.