Understanding the Need for Camera Access in Chrome
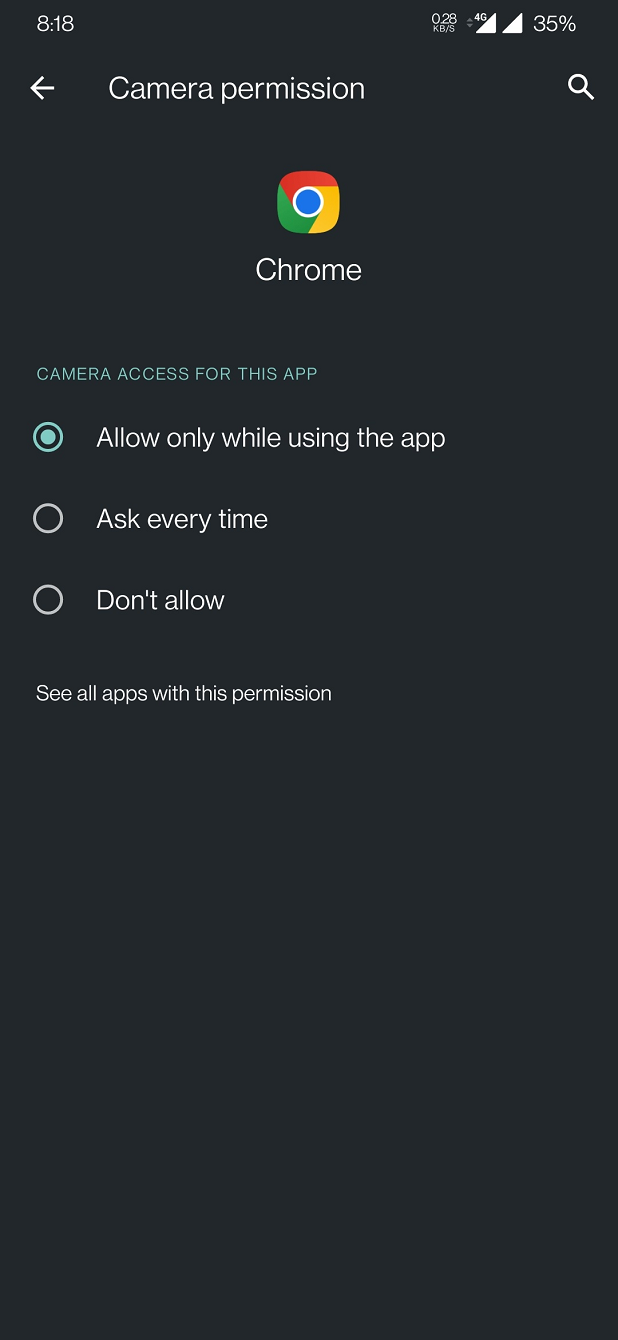
When using Google Chrome, granting camera access to various websites and applications is often necessary for full functionality. Understanding why and how camera access is requested can help ensure that your online experiences are both seamless and secure.
Why Websites and Applications Request Camera Access
Video Conferencing and Chats
Many websites and applications within Chrome are designed for video conferencing, virtual meetings, and video chat services. These platforms require camera access to enable face-to-face communication with colleagues, friends, or family.
Content Creation
For content creators, access to a camera is essential for live streaming, recording video blogs (vlogs), or creating other forms of multimedia content directly within the browser.
Authentication and Verification
Some web services might use camera access for identity verification purposes, such as facial recognition for secure logins or to confirm a user’s presence during online exams or certifications.
Augmented Reality (AR) and Filters
Web-based AR experiences and applications that use real-time photo filters (like virtual try-ons for glasses or makeup) also need camera access to overlay digital information onto the physical world.
How Chrome Manages Camera Access
Permission Requests
Chrome typically asks for permission before allowing any website or web application to access your camera. A pop-up will appear the first time a site attempts to use your camera, and you can allow or block access.
Site Settings and Permissions
If you’ve previously granted or denied camera access to a website, Chrome remembers your choice. You can review or change permissions by clicking on the padlock icon next to the website’s URL in the address bar and selecting ‘Site settings’.
Privacy Considerations
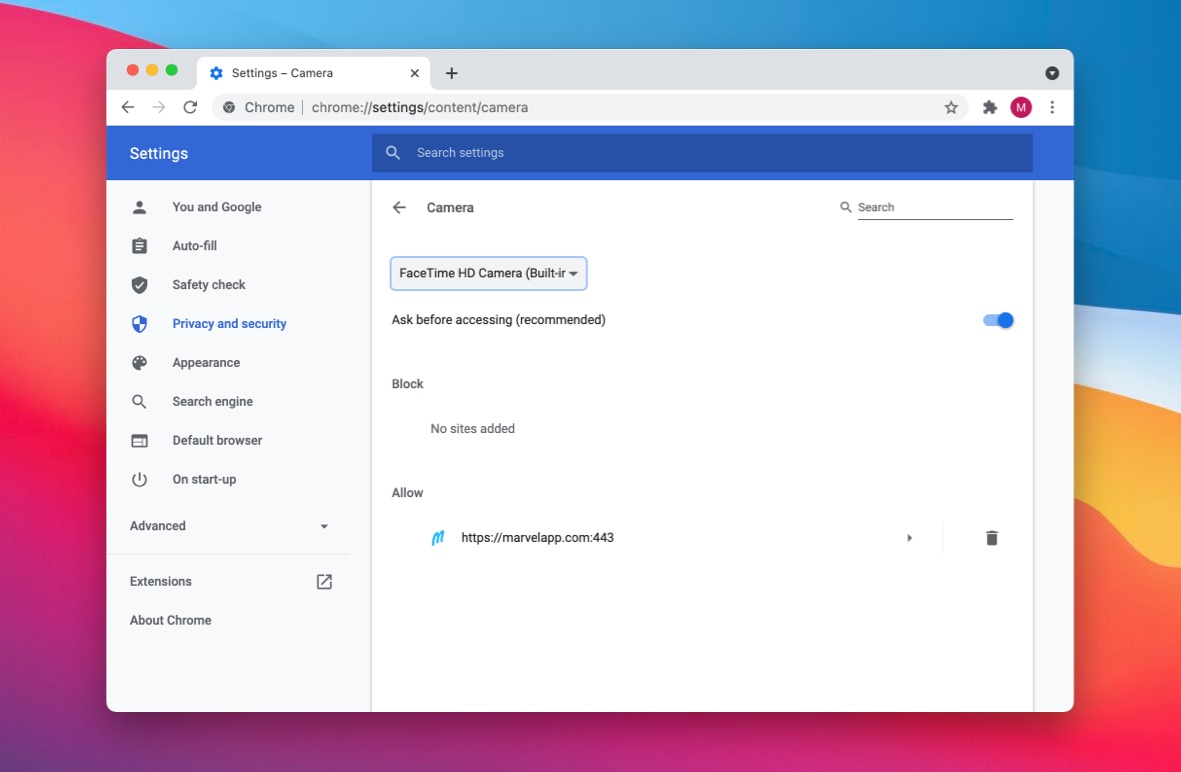
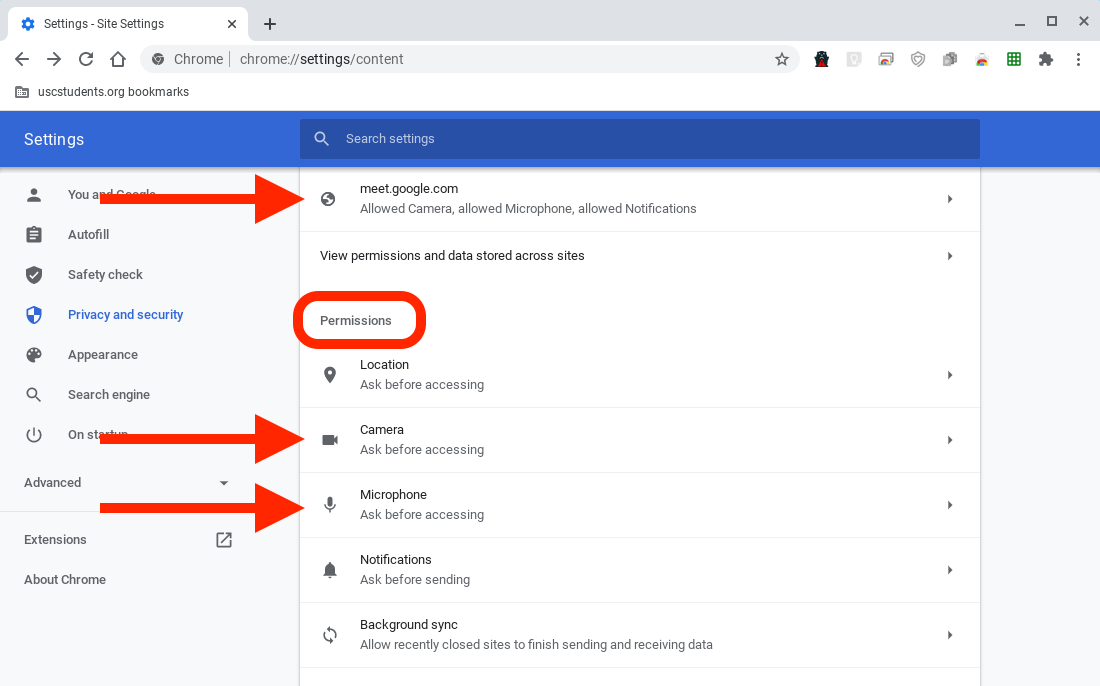
Chrome’s emphasis on user privacy means that you have control over which sites can access your camera. You can manage general camera access in Chrome’s settings by navigating to Privacy and security > Site Settings > Camera.
Security Warnings
Chrome will warn you if it believes granting camera access may pose a security risk, either because the site is not secure (lacks HTTPS) or shows signs of malicious behavior.
Troubleshooting Camera Access Issues in Chrome
Check Chrome’s Camera Settings
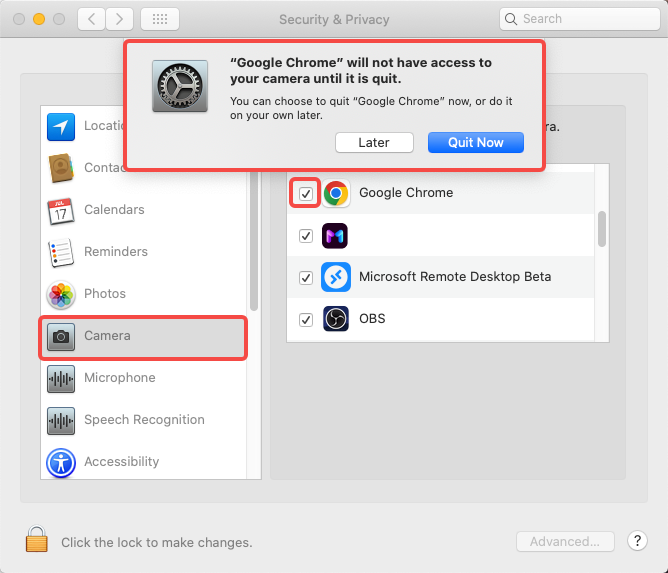
If a site can’t access your camera, ensure that you haven’t accidentally blocked camera access in Chrome’s settings or that your browser isn’t outdated.
Review Permissions for Individual Sites
If a specific site is having trouble accessing your camera, check the permissions for that site in the address bar or in Chrome’s settings under ‘Site settings’.
Ensure Camera Hardware is Working
Make sure your camera hardware is functioning correctly outside of Chrome. Test it with other applications to confirm it’s not a hardware issue.
Updating Chrome
Occasionally, bugs in the browser can affect camera functionality. Keeping Chrome updated to the latest version can often resolve these issues.
Step-by-Step Guide: Granting Camera Access in Chrome (H3)
Step 1: Update and Open Google Chrome
To begin, ensure that your Google Chrome browser is up-to-date, as newer versions often have improved security features and better compatibility with websites requesting camera access. To check for updates, click on the three vertical dots (settings icon) at the top-right corner of the window, then select “Help” > “About Google Chrome.” If there’s an update available, install it, then relaunch the browser.
Visit the website or launch the web app that requires camera access, such as Zoom, Skype, or Google Meet. These platforms typically have a ‘Join Meeting’ or ‘Start Video’ button which prompts a request for camera access.
Step 3: Grant Permission for Camera Access
When the website attempts to access your camera, a prompt will appear at the top of the screen asking if you want to allow or block access to the camera. Click on the “Allow” button to grant permission.
Note: If no prompt appears, or if you accidentally clicked “Block,” follow the next steps to manage your site permissions manually.
Step 4: Manage Site Permissions (H3)
If you need to adjust camera permissions for a specific site, proceed as follows:
- Click on the lock or information (i) icon located to the left of the URL in the address bar.
- In the drop-down menu, find the “Camera” section. It may say either “Blocked” or “Ask (default)” depending on your previous choice.
- Click on the current status to expand the options, then select “Allow.”
Alternatively, you can also manage camera permissions through Chrome settings:
- Click on the three vertical dots (settings icon), then choose “Settings.”
- Scroll down and click on “Privacy and Security” > “Site Settings.”
- Under “Permissions,” click on “Camera.”
- In the “Camera” settings page, locate the “Allow” section and add the desired website under “Allow access to the camera on this site.”
Advanced Settings and Troubleshooting: Delving Deeper into Dell Camera Solutions
After covering the initial basic steps to solve camera issues, sometimes the solution requires a deeper dive into advanced settings and troubleshooting techniques. These steps are for users who are comfortable with more complex system adjustments and are still seeking solutions after exhausting the basic troubleshooting methods.
Delving into the Device Manager
Accessing Hidden Camera Devices
Sometimes, the camera may not be visible because it’s hidden in Device Manager. To show hidden devices, open the Device Manager, click on the ‘View’ menu, and select ‘Show hidden devices’. If you find your camera listed there, you can try to enable it.
Checking for Conflicting Devices
Within Device Manager, it’s also possible that other imaging devices could be conflicting with your Dell camera. Disabling other devices temporarily could help determine if there’s a conflict causing the issue.
Editing the Registry (Caution Advised)
Backup Your Registry
Before making any changes to the registry, it’s essential to back it up. Mistakes in the registry can cause significant system problems.
Modify Camera-Related Registry Entries
For advanced users, modifying specific registry entries related to the camera can solve deeper issues. This should only be attempted by those who understand the risks and steps involved in registry editing.
BIOS Considerations
Updating the BIOS
A BIOS update can resolve hardware compatibility issues. Check Dell’s official website for any BIOS updates for your specific model. Be sure to follow the instructions carefully, as incorrect BIOS updates can harm your system’s functionality.
BIOS Configuration
Enter the BIOS settings during startup and ensure that the camera is enabled. In some cases, the camera can be disabled from the BIOS, preventing it from being used in the operating system.
Examining System Logs
Event Viewer for Camera Errors
Windows Event Viewer can reveal camera-related errors that have occurred. Look under the ‘Windows Logs’ > ‘System’ to find any relevant error messages that could provide clues to the camera issue.
Reliability Monitor for a History of Camera Problems
The Reliability Monitor is another tool that provides a timeline of system events, including any camera failures. It can be accessed by typing ‘Reliability Monitor’ in the Start menu search.
Advanced Software Fixes
Resetting the Camera App
If you’re facing issues specifically with the Windows Camera app, you can reset it by going to Settings > Apps > Camera > Advanced options and clicking on ‘Reset’.
Running System File Checker
Corrupt system files can cause a range of problems. Running the System File Checker tool can help repair these files. Open Command Prompt as an administrator and type sfc /scannow to initiate the scan.
