
Photographing waterfalls can be a rewarding experience for any photographer. The combination of movement, light, and natural beauty presents an opportunity to create truly captivating imagery. Here are some tips and techniques for capturing waterfall scenes effectively with a camera.
Choosing the Right Equipment
When it comes to photographing waterfalls, the right equipment can make a significant difference in the outcome of your images. While a good eye and a sense of composition are crucial, the gear you use will help you capture the technical quality and artistic effect you desire.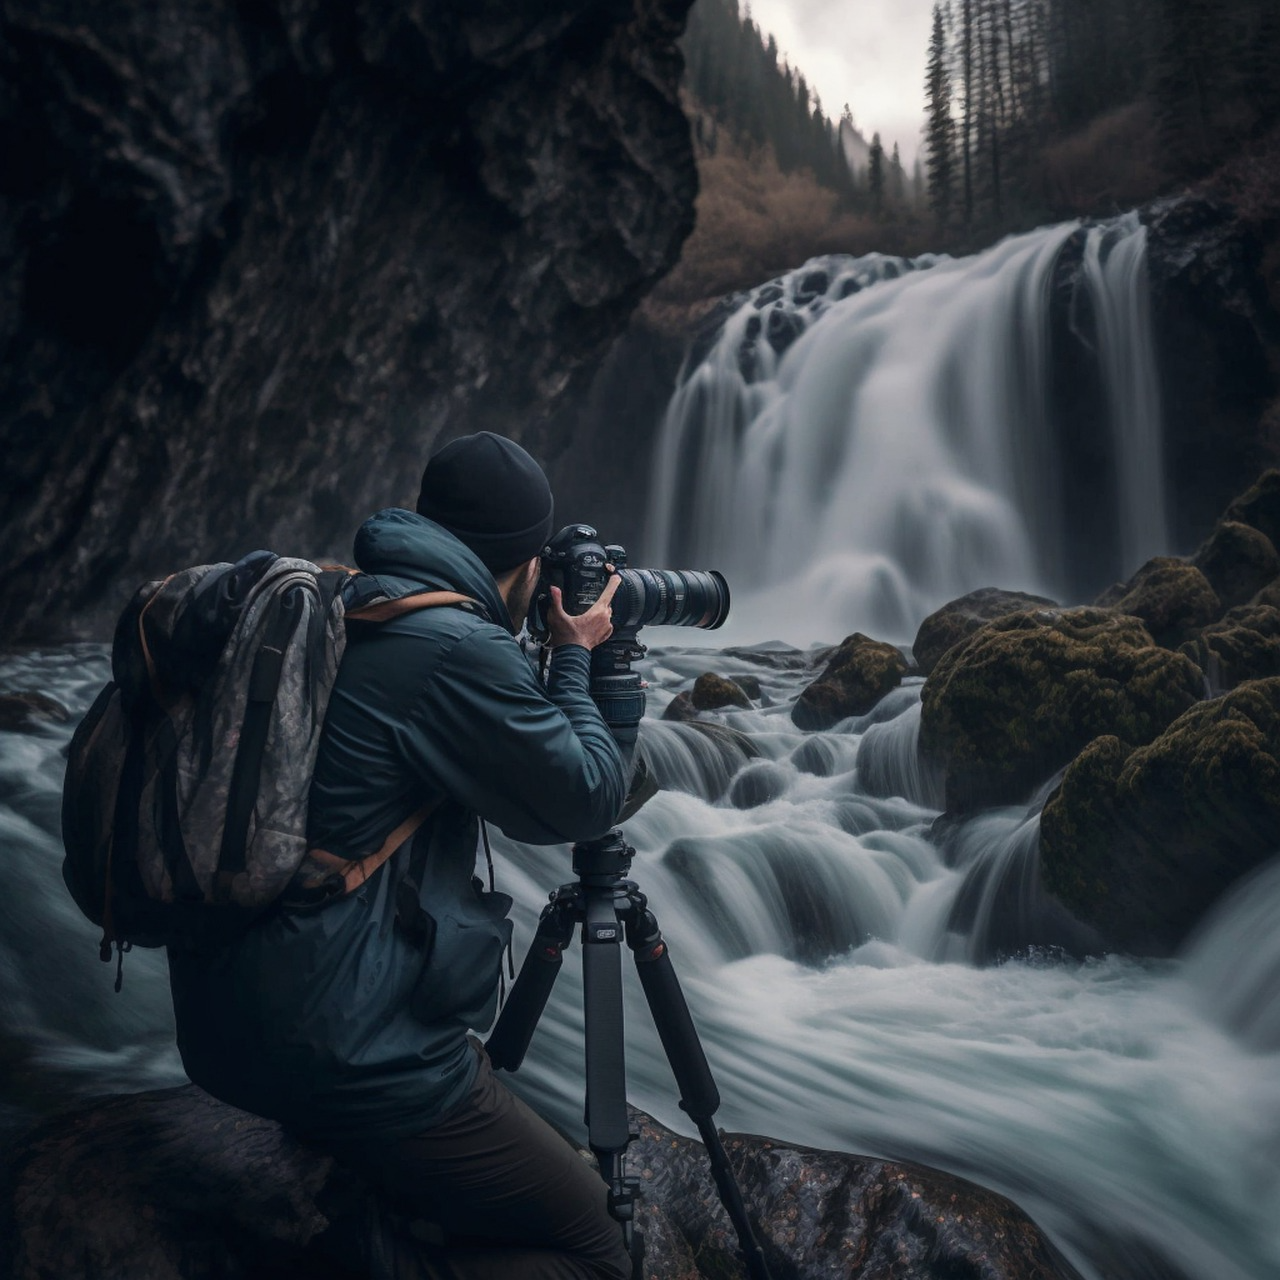
Selecting a Camera with Manual Controls
DSLRs and Mirrorless Cameras
A DSLR (Digital Single-Lens Reflex) or mirrorless camera with manual settings is highly recommended for waterfall photography. These types of cameras offer the ability to adjust shutter speed, aperture, and ISO settings, which is essential for capturing waterfalls in varying lighting conditions and for achieving different creative effects.
Point-and-Shoot Cameras and Smartphones
High-end point-and-shoot cameras and modern smartphones can also be suitable for waterfall photography, especially if they have manual or semi-manual modes. While they may not offer the same level of control or image quality as DSLRs or mirrorless cameras, they can still produce beautiful waterfall images with the right techniques.
Choosing Lenses for Different Perspectives
Wide-Angle Lenses
A wide-angle lens is excellent for capturing the grandeur of a waterfall and its surroundings. These lenses allow you to include more of the scene in the frame, which is particularly useful in tight spaces or when you want to emphasize the scale of the waterfall.
Telephoto Lenses
A telephoto lens is useful for isolating specific parts of the waterfall or for creating close-up shots that highlight the details and textures of the water. They’re also ideal for photographing waterfalls that are far away or inaccessible.
Lens Filters
Using lens filters can enhance your waterfall photography. A polarizing filter can reduce glare on wet surfaces and increase color saturation, making the greens of the foliage and the blues of the water more vibrant. Neutral density (ND) filters are also crucial for waterfall photography as they allow you to use slower shutter speeds in bright conditions to achieve the desired motion blur in the falling water.
The Necessity of a Stable Tripod
A sturdy tripod is essential for waterfall photography, especially when shooting long exposures. It prevents camera shake and ensures sharp images. Look for a tripod that’s durable enough to withstand the outdoor elements and versatile enough to adjust to uneven terrain.
Additional Accessories for Waterfall Photography
Remote Shutter Release
A remote shutter release allows you to take photos without touching the camera, minimizing the risk of camera shake during long exposures. This can be a physical remote cable or a wireless system.
Weather Protection
Waterfalls often create mist, which can damage your equipment. Weather-sealed camera bodies and lenses offer extra protection, but you should also consider carrying rain covers for your camera and lens, as well as protective bags for other gear.
Extra Batteries and Memory Cards
The cold and damp environments typical of waterfall locations can drain batteries quickly. Carry spare, fully-charged batteries and extra memory cards to ensure you don’t miss any photographic opportunities.
By investing in the right equipment for waterfall photography, you can be assured that you are well-prepared to capture the dynamic beauty of waterfalls. The combination of a camera with manual controls, suitable lenses, a stable tripod, and other accessories will enable you to explore various creative possibilities and achieve stunning results.
Camera Settings for Waterfall Photography
Mastering Shutter Speed
Shutter speed is crucial for capturing the motion of the waterfall. A fast shutter speed will freeze the motion, showing individual droplets, while a slow shutter speed will blur the motion, creating a soft, flowing effect.
Aperture and ISO Considerations
Use a small aperture (high f-number) to keep the entire scene in focus. Keep the ISO as low as possible to reduce noise and achieve a high-quality image.
Composing the Shot
Finding the Right Perspective
Experiment with different angles and perspectives to find the most striking composition. Consider the rule of thirds and use surrounding elements, such as rocks or trees, to frame the waterfall.
Incorporating the Environment
Include elements of the environment, like foliage or wildlife, to add context and scale to the image. This can also enhance the storytelling aspect of your photograph.
Dealing with Lighting and Weather
Using Natural Light to Your Advantage
The best light for waterfall photography is often on overcast days when the light is soft and even. Bright sunlight can create harsh shadows and highlights that are challenging to photograph.
Managing Water Spray and Moisture
Protect your camera from water spray with a rain cover or similar protection. Be aware of the wind direction and position yourself and your equipment accordingly.
Post-Processing Waterfall Photos
Post-processing is a critical phase in photography where you refine and enhance your images to match the vision you had when you captured them. Waterfall photos can particularly benefit from thoughtful post-processing to bring attention to the water’s motion and texture, as well as to adjust the overall mood and impact of the image.
Basic Adjustments in Photo Editing Software
Exposure and Contrast
Start by adjusting the exposure to ensure your image has the right balance of light and shadow. You might need to brighten the image if it’s underexposed or tone it down if it’s overexposed. Adjusting the contrast can help to make the waterfall stand out from the surrounding elements by deepening shadows and highlighting bright areas.
White Balance and Color Correction
Waterfall scenes can sometimes appear too cool or warm depending on the lighting conditions at the time of shooting. Adjust the white balance to correct color casts and achieve more natural-looking water and foliage. You can also selectively adjust the saturation and hues of certain colors to make the scene more vibrant or to create a specific mood.
Refining Water Detail and Texture
Sharpness and Clarity
Enhance the detail and texture of the water by carefully adjusting the sharpness and clarity sliders. Be cautious not to overdo it, as too much sharpening can introduce unwanted noise and artifacts. The goal is to make the water’s flow look smooth and silky without sacrificing the natural look of the scene.
Noise Reduction
Long exposure shots required for capturing the smooth motion of waterfalls can introduce noise, especially in low-light conditions. Use the noise reduction feature to clean up the image while preserving as much detail as possible.
Advanced Techniques for Creative Effects
Layer Masks and Blending
For more control over the adjustments, you can use layer masks in software like Adobe Photoshop. This allows you to apply changes to specific parts of the image—such as just the waterfall or the sky—without affecting the rest of the scene. Blending different exposures of the same shot can also help balance the dynamic range and bring out details in the highlights and shadows.
Dodging and Burning
The dodge and burn tools can be used to selectively brighten (dodge) or darken (burn) areas of your image. This can draw attention to the waterfall or create a more dramatic environment.
Finalizing Your Image
Cropping and Straightening
Evaluate the composition once more and make any necessary adjustments. Cropping can help to remove distractions or change the aspect ratio, while straightening ensures that your horizon lines and other structural elements are level.
Output Sharpening
When you’re satisfied with your edits and ready to share your image, apply output sharpening. This is a final tweak to ensure the image looks its best on whichever medium it will be displayed, whether that’s a digital screen or a print.
Post-processing waterfall photos is both an art and a technical skill, offering the opportunity to emphasize the natural beauty of the scene and communicate the feeling of being there. By applying these post-processing techniques, you can produce captivating images that showcase waterfalls in all their splendor. Remember, the key to successful post-processing is subtlety; your aim should be to enhance the photo’s natural charm, not to overshadow it.