Introduction to Wyze Cam v2
The Wyze Cam v2 is a compact, affordable home security camera that offers users a wealth of features such as 1080p full HD video quality, night vision, and two-way audio. Setting up the Wyze Cam v2 is a straightforward process designed to get your home security up and running in no time. This article will guide you through each step of setting up your Wyze Cam v2, ensuring that you can start monitoring your home as quickly and efficiently as possible.
Unboxing and Understanding Your Wyze Cam v2
What’s in the Box?
Upon opening your Wyze Cam v2 package, you’ll be greeted by an array of essential components. The box typically includes:
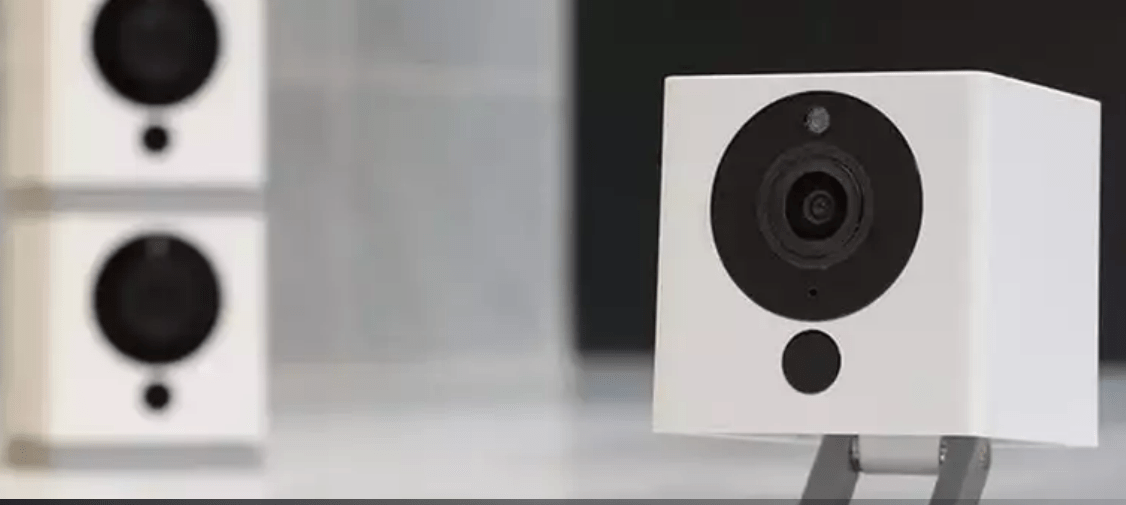
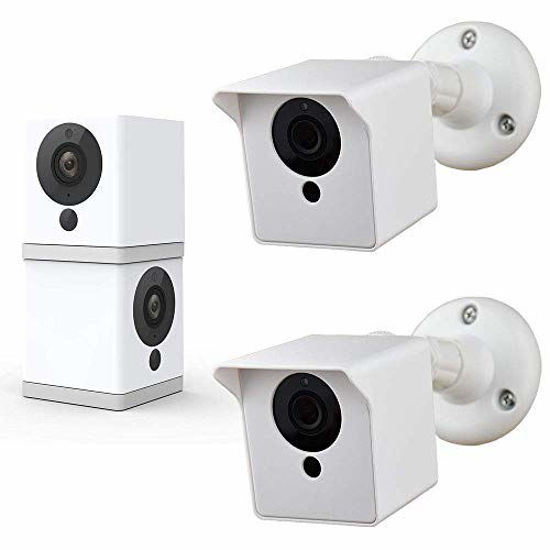
- Wyze Cam v2 Unit: This compact, cube-shaped camera is designed with simplicity and versatility in mind. It sports a high-quality lens for crisp 1080p Full HD video recording, complemented by a built-in infrared LED array for superior night vision capabilities.
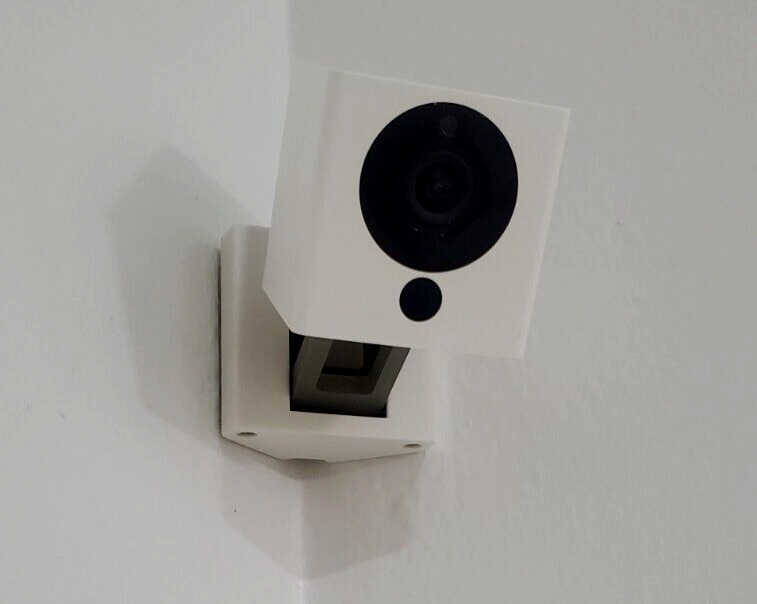
- Magnetic Base: A strong magnetic base allows for easy attachment to metal surfaces or can be mounted using the included hardware on walls, ceilings, or other surfaces. This feature provides flexibility in positioning your camera for the perfect viewing angle.
- Mounting Hardware: The kit consists of screws, anchors, and a versatile mounting bracket that can swivel and tilt, ensuring you can install your Wyze Cam v2 virtually anywhere in your home.
- Power Adapter and USB Cable: A standard micro-USB cable connects the camera to the power adapter, providing continuous power supply. The cable is long enough to accommodate most indoor setups without requiring extension cords.
- Quick Start Guide: This user-friendly guide offers a concise set of instructions to get your Wyze Cam v2 up and running quickly. It covers everything from charging the camera to connecting it to Wi-Fi and setting it up within the Wyze app.
Physical Overview
The Wyze Cam v2’s sleek design houses several key features:
- Lens: At the front of the camera is a wide-angle lens capable of capturing a broad field of view, ideal for monitoring large spaces or specific areas like entryways, living rooms, or nurseries.
- Microphone and Speaker: Dual audio functionality enables two-way communication between the camera and your smartphone. The microphone picks up sounds near the camera while the speaker allows you to talk through the app, making it perfect for communicating with family members or pets at home.
- LED Indicator: Located on the front, this light indicates the status of the camera—such as when it’s powered on, connected to Wi-Fi, or recording.
-
MicroSD Card Slot: Hidden behind a weather-resistant cover, the microSD card slot (card not included) lets you store footage locally for added security or extended recording times beyond the free 12-second motion detection clips offered by the Wyze Cloud.
Inspecting the Camera and Accessories
Examine the Wyze Cam v2 and its accessories for any signs of damage or defect. If everything looks good, you’re ready to proceed with the setup.
Choosing the Optimal Location
Decide where you want to place your camera. It should be within reach of a power outlet and in a position that covers the desired area of your home. The Wyze Cam v2’s magnetic base and adhesive tape provide multiple mounting options, whether you want to place it on a shelf or mount it to a wall.
Setting Up the Wyze Cam v2 in the Wyze App
Installing the Wyze App
The Wyze App is the control center for all your Wyze devices. Download the app from the Apple App Store or Google Play Store and create a Wyze account if you haven’t already done so.
Account Creation and Login
Follow the in-app instructions to create a new account or log in to your existing Wyze account. You’ll need a valid email address and will be required to verify it during the process.
Adding Your Wyze Cam v2 to the App
Once logged in, tap the ‘+’ sign in the Wyze App, select ‘Add Device,’ and choose ‘Wyze Cam v2’ from the list of devices. The app will guide you through the steps to connect your camera to your Wi-Fi network.
Connecting Wyze Cam v2 to Your Wi-Fi Network
Preparing for Connection
Ensure your smartphone or tablet is connected to your Wi-Fi network and you have the network password ready. The Wyze Cam v2 only supports 2.4GHz Wi-Fi networks, so make sure you’re not trying to connect to a 5GHz network.
Plugging in Your Wyze Cam v2
Connect the USB cable to your camera and plug the other end into the power adapter. Then, plug the adapter into a power outlet. The camera will light up, indicating it’s powered on.
Syncing the Camera with the App
The Wyze App will provide instructions on how to sync the camera with the app. This usually involves pressing a button on the camera and waiting for an audible signal before proceeding with the in-app instructions.

Finalizing the Setup and Placement
Step 1: Charging the Camera
Before setting up your Wyze Cam v2, ensure it’s fully charged using the provided power adapter and USB cable. Plug one end of the cable into the camera’s micro-USB port and the other into a power outlet. The LED indicator will let you know when the camera is charging (usually with a solid red light) and when it’s fully charged (light turns off).
Step 2: Downloading and Installing the Wyze App
Visit your smartphone’s app store to download and install the free Wyze app. Create an account or log in if you already have one. The app serves as the central hub for all your Wyze devices, allowing you to control settings, view live streams, and manage recordings.
Step 3: Connecting Your Wyze Cam v2 to Wi-Fi
Follow the prompts within the Wyze app to add a new device. Hold the camera close to your smartphone so that they can pair via Bluetooth. Select your Wi-Fi network from the list, enter the password, and wait for the camera to connect. Once connected, the app will confirm successful setup.
Step 4: Positioning and Mounting
Consider the location where you want to place your Wyze Cam v2. It should be close to a power outlet. And ideally provide a wide view of the area you wish to monitor. Use the magnetic base or mounting hardware to secure the camera in position. Ensure that the lens isn’t obstructed and that the field of view covers your desired monitoring space.

Step 5: Configuring Settings
Within the app, customize your camera settings according to your preferences. This may include adjusting motion detection sensitivity, scheduling recording times. And turning on audio alerts, or enabling continuous recording if you’ve inserted a microSD card.
Step 6: Testing
Once your Wyze Cam v2 is mounted and set up, test its functionality by viewing the live stream, triggering motion events, and checking recorded clips. Make any necessary adjustments to achieve optimal performance and coverage.
Remember, placement is key. Factors like lighting conditions, obstructions, and privacy concerns should all be taken into account. And when deciding where to place your Wyze Cam v2. Regularly reviewing your camera’s footage and settings will help you fine-tune its operation for maximum effectiveness in your home security or monitoring system.
Conclusion:
Setting up your Wyze Cam v2 is a simple process that you can complete in just a few minutes. By following the steps outlined in this guide, you can ensure that your camera is properly installed, configured. And ready to help you keep an eye on your home. The Wyze Cam v2’s user-friendly design and versatile app integration make it a great choice for those seeking an effective and accessible home security solution.