Ensuring Basic Functionality of Lenovo Laptop Camera
Confirming Physical Components
Firstly, physically inspect your Lenovo laptop to make sure no obstructions are blocking the camera. If your model includes a privacy shutter, ensure that it is fully opened. Some users may inadvertently leave this closed, which prevents the camera from capturing any image.
Checking Keyboard Shortcuts
Lenovo laptops often have function keys that can disable the camera to protect user privacy. Typically, this can be toggled by pressing the ‘Fn’ key along with one of the function keys (F1-F12). Look for a camera icon on your function keys, which might also be highlighted with a different color to indicate a secondary action. Pressing ‘Fn’ and that key simultaneously could reactivate your disabled camera.
Digital Verification of Lenovo Laptop Camera
Device Manager Overview
The Device Manager in Windows is a central hub for checking the status of hardware components. Access it by right-clicking the Start button and selecting Device Manager. Under ‘Cameras’ or ‘Imaging devices’, you should see your built-in camera listed. If there is a down arrow on the icon, the camera is disabled. Right-click on the camera and select ‘Enable device’.
Missing Camera in Device Manager
If the camera isn’t listed in Device Manager, it might be a sign of a deeper issue. It could be disconnected internally, drivers might be missing, or the camera could be disabled in the BIOS. At this stage, consider restarting your computer first. If the problem persists, it will require more advanced troubleshooting.
Software and Settings Checks of Lenovo Laptop Camera
Privacy Settings in Windows
Windows 10 and later include privacy settings that control which applications can access your camera. Navigate to ‘Settings’ > ‘Privacy’ > ‘Camera’. Here, you can allow or deny camera access to apps. Make sure that access is enabled for the applications you wish to use with the camera.
Lenovo Vantage Software
Lenovo provides a utility called Lenovo Vantage for managing system updates and hardware settings. It can be particularly helpful for camera issues. Open Lenovo Vantage and explore the hardware settings to check if the camera has been disabled through the software.
Testing with Different Applications of Lenovo Laptop Camera
Using Multiple Applications
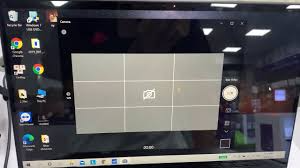
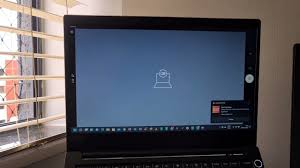
Sometimes, the issue might be with a specific application rather than the camera itself. Test the camera with different software like the Camera app in Windows, Skype, or Zoom. If the camera works with some applications and not others, the issue is likely with the particular app’s settings or permissions.
Update and Restart of Lenovo Laptop Camera
Checking for System Updates
Outdated system drivers or operating system versions can cause compatibility issues with the camera. Check for updates through ‘Settings’ > ‘Update & Security’ > ‘Windows Update’ and install any pending updates.
The Power of a Restart
Never underestimate the effectiveness of a simple restart. It can resolve a multitude of issues by refreshing the system and clearing temporary conflicts. Before moving on to more complex solutions, restart your laptop and check if the camera starts working again.

Conclusion
Performing these preliminary checks can resolve common camera issues with Lenovo laptops. They are geared towards verifying the basic functionality of the camera, both physically and digitally, and ensuring that software settings are correctly configured. If these steps do not resolve the issue, you may need to delve into more advanced troubleshooting, including driver reinstallation or hardware diagnostics.
Updating or Reinstalling Camera Drivers
Update Drivers
Outdated or corrupt camera drivers can cause the camera to stop working. To update your camera drivers, go to Device Manager, right-click on your camera, and select ‘Update driver’. Choose ‘Search automatically for updated driver software’, and follow the prompts to install any found updates.
Reinstall the Camera
If updating doesn’t resolve the issue, try reinstalling the camera. In Device Manager, right-click on the camera and select ‘Uninstall device’. Confirm any prompts, then restart your laptop. Windows should automatically attempt to reinstall the camera driver upon reboot.
Lenovo Vantage Software
Utilize Lenovo’s Built-In Solution
Lenovo provides a tool called Lenovo Vantage that helps manage your device’s drivers, updates, and hardware settings. You can use this software to check for the latest updates for your camera and other system components.
Adjust Camera Privacy Settings
Lenovo Vantage also allows you to control your privacy settings. Ensure that the camera privacy mode is turned off, as this setting can prevent the camera from functioning in any application.
Software and Privacy Settings
Review App Permissions
In Windows 10 and 11, privacy settings may restrict camera access to certain apps. Navigate to ‘Settings’ > ‘Privacy’ > ‘Camera’ to review which apps have permission to use the camera. Ensure that the toggle for ‘Allow apps to access your camera’ is switched on.
Update Your Operating System
Keeping your operating system up-to-date is crucial for both security and functionality. A pending update may resolve your camera issue. Check for updates by going to ‘Settings’ > ‘Update & Security’ > ‘Windows Update’, and install any available updates.
Advanced Hardware Troubleshooting for Lenovo Laptop Cameras
When simpler software-related solutions do not resolve camera issues on a Lenovo laptop, it may be necessary to investigate potential hardware problems. Here are steps to identify and possibly fix hardware issues related to the camera.

Inspecting Internal Connections
Accessing the Laptop Internals
If you are comfortable with opening up your laptop, you may check if the camera’s ribbon cable has come loose from the motherboard. This is a delicate procedure and typically requires special tools. If you are not confident in doing this, it is advisable to take your laptop to a professional.
Checking the Camera Cable
Inside the laptop, locate the thin cable that connects the camera to the motherboard. If this cable is loose or disconnected, carefully reattach it, ensuring a snug and correct fit. Any visible damage to the cable may require a replacement.
Using the BIOS to Diagnose Camera Issues
Accessing the BIOS or UEFI
Restart your Lenovo laptop and enter the BIOS or UEFI firmware settings. This is usually done by pressing a specific key such as F1, F2, or Enter during the boot process. The correct key to press is often displayed briefly on-screen during startup.
Checking for Camera Recognition
Within the BIOS settings, look for sections that pertain to integrated devices or peripherals. If the camera is recognized by the BIOS, it will typically be listed here. If the camera is not recognized, this could indicate a hardware failure.
Considering Professional Repair Options
Assessing Repair Viability
If hardware issues are suspected and the camera is still not functioning after checking internal connections and BIOS settings, the next step may be professional repair. This is especially true if the laptop is still under warranty or if the technical work required is beyond your comfort level.
Contacting Lenovo Support
Reach out to Lenovo customer support for guidance. They can offer advice on warranty coverage, authorized repair centers, and potential costs if the laptop is out of warranty.
Understanding Common Hardware Failures
Wear and Tear
Regular use can lead to wear and tear on the internal components of a laptop. Physical damage from drops or spills can also affect the hardware functionality.
Manufacturing Defects
In some cases, a camera may stop working due to a manufacturing defect. If a significant number of users report similar issues with the same model, this might be the case. Keeping track of manufacturer recalls or repair programs can provide insight into known defects.
Preventative Measures for the Future
Regular Maintenance
To prevent future hardware issues, regular maintenance is key. This includes keeping the laptop clean, avoiding exposure to extreme temperatures, and handling the device with care, especially when opening and closing the lid which houses the camera module.
Using Protective Accessories
Invest in a quality carrying case to protect your laptop from physical damage. Avoid placing heavy items on top of the laptop, which can put pressure on the screen and the built-in camera.
Conclusion
Hardware troubleshooting for a Lenovo laptop camera is a process that ranges from checking internal connections to considering professional repairs. Taking a systematic approach can help isolate the issue, whether it’s a loose component, a BIOS setting, or a more serious hardware failure. If you are not experienced with hardware repairs, seeking professional assistance is the safest option to avoid causing further damage to your laptop.
Conclusion
Camera issues on Lenovo laptops can often be resolved through a series of simple checks and adjustments. Start by ensuring the camera is enabled, then move on to updating drivers, adjusting software settings, and consulting Lenovo’s own tools. If these steps don’t work, you might be dealing with a hardware issue that requires professional attention. Always remember to keep your system up-to-date to prevent such issues from occurring.