Introduction to Macro Photography
Macro photography opens up a world of minute details. It turns tiny subjects into large images that reveal intricate textures and patterns not usually visible to the naked eye. A macro camera lens is key for this kind of photography. It lets you get up close and personal with your subject, whether it’s the delicate veins of a leaf or the vibrant colors on an insect’s wing.
To start with macro photography, you need more than just a macro camera lens. Understanding the basics of magnification and the distance between your lens and the subject is crucial. The aim is to capture life at a scale that’s full of wonder and detail. When you photograph with a macro lens, you can show a side of the world that people often overlook. Each shot invites viewers to stop and take a closer look at the tiny miracles all around us.
Macro photography isn’t just about snapping a photo but creating a connection between the subject and the viewer. By using a macro camera lens, you can transform the small scenes into breathtaking images. It requires practice, patience, and a passion for the smaller details in life. Whether you are an amateur or a seasoned photographer, macro photography can be both a challenging and rewarding experience.
Essential Features of Macro Camera Lenses
A macro camera lens has features that set it apart from standard lenses. Here are key features to consider:
Magnification Ratio
The magnification ratio determines how large a subject appears. A true macro lens has a 1:1 or higher ratio. This means the image on the sensor is as big as the subject itself.
Focal Length
Focal length affects working distance. Longer focal lengths offer more space between you and the subject. This is important when you can’t get too close.
Lens Design
A good macro camera lens minimizes distortion. This ensures high image quality with true-to-life results. Consider lenses with aspherical elements for the best performance.
Image Stabilization
Shakiness can ruin macro shots. Image stabilization helps. Choose a lens with built-in stabilization features to reduce camera shake.
When you pick a macro camera lens, these features matter the most. They affect how you capture the tiny details that make macro photography striking. Make sure to check each feature before you buy a lens. Your macro photography will shine with the right tools.
The Different Types of Macro Lenses
When diving into the world of macro photography, knowing the different types of macro camera lenses is essential. Each type has unique advantages that can help you capture your subject with stunning clarity and detail. Here are the primary types you might consider:
Prime Macro Lenses
Prime macro lenses have a fixed focal length. They are known for their sharpness and high image quality. Because they do not zoom, you move closer or farther to change composition. These lenses are great for precision and typically offer a 1:1 magnification ratio. Common focal lengths include 50mm, 90mm, and 100mm.
Telephoto Macro Lenses
These lenses offer a longer focal length, usually above 100mm. This allows for a greater working distance between you and shy or dangerous subjects. It also helps avoid casting shadows on the subject. With telephoto macro lenses, you can get close-up shots while maintaining a comfortable distance.
Macro Zoom Lenses
Macro zoom lenses offer versatility with adjustable focal lengths. While they may not provide a true 1:1 magnification ratio, they’re convenient for photographers who want to switch between macro and standard shooting without changing lenses. Their flexibility makes them a popular choice for hobbyists.
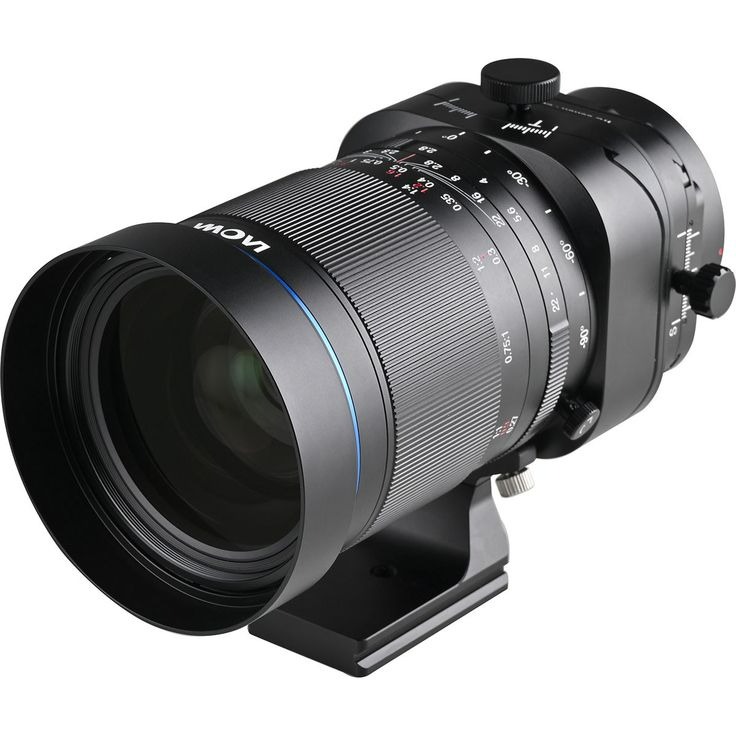
Specialized Macro Lenses
Some macro lenses come with special features designed for specific macro photography needs. This includes lenses with tilt-shift capabilities to manage the plane of focus or those with ultra-macro capabilities, offering greater than 1:1 magnification for extreme close-ups.
Choosing the right type of macro camera lens depends on what you need for your photos. Consider your subjects, working distance, and the level of detail you aim to capture. All these factors influence the kind of macro lens that will best suit your photography style.

Choosing the Right Macro Lens for Your Camera
Choosing the correct macro camera lens is vital for stunning close-ups. It’s not just about the lens features. You must also consider your camera body and photography style. Here’s how to make the right choice:
- Camera Compatibility: Check if the lens fits your camera. Brands often design lenses for specific camera bodies.
- Subject and Environment: Think about what you will shoot. If you’re aiming for insects that might be scared off by your presence, a telephoto macro lens is ideal. It gives you distance without losing detail.
- Budget: Macro lenses come at various prices. Decide how much you’re willing to spend. Sometimes, a prime macro lens is more affordable than a zoom or specialized option.
- Lens Quality: Higher-priced lenses usually offer better image quality. They also tend to have more features, like image stabilization.
- Photography Style: Do you move around a lot or stay in one place? A zoom lens might suit an active style. A prime lens could be better for a more controlled setting.
Remember, there’s no one-size-fits-all. Test different lenses if possible. Rent or borrow to find what feels best for you. A good macro camera lens is an investment. It will bring your macro photography to life and last for years. When chosen wisely, it will match not only your current needs but also your growing skills as a photographer.
Techniques for Mastering Close-Up Photography
Mastering close-up photography requires skill and an eye for detail. Here are practical techniques to get stunning macro shots.
Understand Depth of Field
Depth of field is crucial in macro photography. A narrow depth of field puts the focus on your subject. It blurs out distractions. Use a small aperture to achieve this effect.
Use Manual Focus
Autofocus can struggle with close-up subjects. Switch to manual focus for precision. You can make minute adjustments to capture sharp details.
Keep Your Camera Steady
A tripod is your best friend in macro photography. It prevents camera shake and keeps your shot steady. For hand-held shots, use a faster shutter speed.
Light Your Subject Well
Good lighting brings out the details. Use natural light or get a ring light for consistent illumination. Play with the light angle to highlight textures.
Practice Patience
Macro photography often means waiting for the perfect moment. Be patient and wait for the right light or for the wind to stop. Your patience will pay off in the quality of your photos.
Experiment with Composition
Move around your subject to find interesting angles. Try different perspectives to see what looks best. Composition can turn a good photo into a great one.
These techniques will guide you in mastering the art of close-up photography with your macro camera lens. Remember that practice is key. The more you shoot, the better your photos will become.
Tips for Lighting in Macro Photography
Good lighting is essential in macro photography. It reveals the fine details and textures of your subject. Here are tips to light your macro photography effectively:
Use Natural Light When Possible
Natural light gives a soft and even look. Shoot early in the morning or late in the afternoon for the best natural lighting. Avoid harsh midday sun that can create unwanted shadows.
Reflectors Can Be Your Allies
Reflectors help to bounce light onto your subject. Use them to fill in the shadows or highlight certain aspects of the subject.
Consider a Ring Light for Even Illumination
A ring light provides consistent light directly around the lens. It’s great for illuminating the whole subject evenly and reducing shadows.
Experiment With Diffusers
Diffusers spread light softly over the subject. They can prevent harsh light from ruining your macro shots. You can use portable diffusers or even DIY solutions.
Flash Can Bring Out Details
A flash, especially one designed for macro photography, can highlight details. Use it sparingly to avoid overpowering the natural look of your subject.
Control Shadows with Positioning
Be mindful of where your light is coming from. Position your light source so it doesn’t cast unwanted shadows over your subject.
Pay Attention to the Background
The background should complement your subject. Ensure the lighting on the background isn’t too bright or too dark, as this can be distracting.
Proper lighting in macro photography can enhance the clarity and impact of your images. Use a combination of these tips to find the lighting setup that works best for your macro camera lens and subject.
Common Challenges in Macro Photography and How to Overcome Them
Macro photography is as challenging as it is rewarding. It comes with a set of common difficulties that, once understood, can be overcome with practice and the right techniques.
Getting the Right Focus
Focusing closely on subjects magnifies not only the subject but also any focusing errors. It’s essential to use manual focus for precision. Zoom in on your camera’s live view to get the focus just right on the area you want sharp.
Dealing with Camera Shake
Any movement can cause unwanted blur in a macro photograph. Use a sturdy tripod whenever possible. If you’re shooting hand-held, increase your shutter speed to mitigate the effects of camera shake.
Controlling Depth of Field
A narrow depth of field can result in parts of your subject being out of focus. Use a smaller aperture to increase depth of field, but remember that this requires more light. A balancing act is often necessary between aperture, shutter speed, and ISO.
Managing Light
Light can be unpredictable and can change the look of your photo. Use adjustable sources like ring lights, or work with reflectors and diffusers. This gives you more control over the lighting conditions.
Coping with Movement
When shooting living subjects like insects, movement is a challenge. Be patient, move slowly, and if needed, take multiple shots to increase your chances of getting a clear image.
Handling Small Working Spaces
Macro lenses often mean working in tight spaces. Be mindful of your surroundings. Avoid bumping into things that may shake your setup or scare your subject.
By recognizing and learning to manage these challenges, photographers can improve their macro photography skills. Persistence and a willingness to experiment are key in mastering macro camera lens techniques and capturing stunning close-up images.
Post-Processing Macro Photographs
After capturing your close-up shots, post-processing is a crucial step. It fine-tunes your images to perfection. Here are techniques every macro photographer should know:
Enhance Sharpness Carefully
Sharpness is key in macro photography. Use editing software to sharpen your images. But don’t overdo it. Too much can lead to unnatural edges and noise.
Adjust Contrast for Depth
Contrast adjustments can make your subject pop. Increase contrast slightly to enhance depth. Be mindful not to lose detail in the shadows or highlights.
Crop for Composition
Cropping can improve your photo’s composition. Cut out distractions or reframe to focus more on your subject. Keep the original aspect ratio for consistency.
Correct Color Balance
Colors should look natural. Adjust the white balance if the colors seem off. This ensures your subject’s true colors stand out.
Utilize Layers for Non-Destructive Edits
Layers in editing software let you make changes without altering the original. Use them to test different adjustments. You can always revert back if needed.
Dodge and Burn with Precision
Dodge and burn techniques lighten or darken areas. Use them to highlight details or deepen shadows. Apply subtly for a more realistic effect.
Save in the Right Format
Save your edited images in a high-quality format. Formats like TIFF or PNG preserve more detail than JPEG. Remember to save your original, unedited file too.
Post-processing can turn good macro shots into great ones. Take the time to learn these techniques, and watch your macro photography improve with each edited image. Remember to not rush this process. Patience and attention to detail in post-processing are as vital as when you’re behind the macro camera lens.